
| 일 | 월 | 화 | 수 | 목 | 금 | 토 |
|---|---|---|---|---|---|---|
| 1 | 2 | 3 | 4 | 5 | ||
| 6 | 7 | 8 | 9 | 10 | 11 | 12 |
| 13 | 14 | 15 | 16 | 17 | 18 | 19 |
| 20 | 21 | 22 | 23 | 24 | 25 | 26 |
| 27 | 28 | 29 | 30 |
Tags
- GPU
- 공간시각화
- QGIS설치
- qgis
- 딥러닝
- fastapi
- streamlit
- 머신러닝
- CUDA
- 실기
- 2유형
- ml 웹서빙
- webserving
- DASH
- K최근접이웃
- KNN
- 예제소스
- gradio
- Kaggle
- dl
- Ai
- 성능
- 빅데이터분석기사
- 3유형
- 캐글
- 인공지능
- ㅂ
- pytorch
- 1유형
- 공간분석
Archives
- Today
- Total
에코프로.AI
[사전학습] ObjectDetection (Feat. efficientdet, OpenCV) 본문
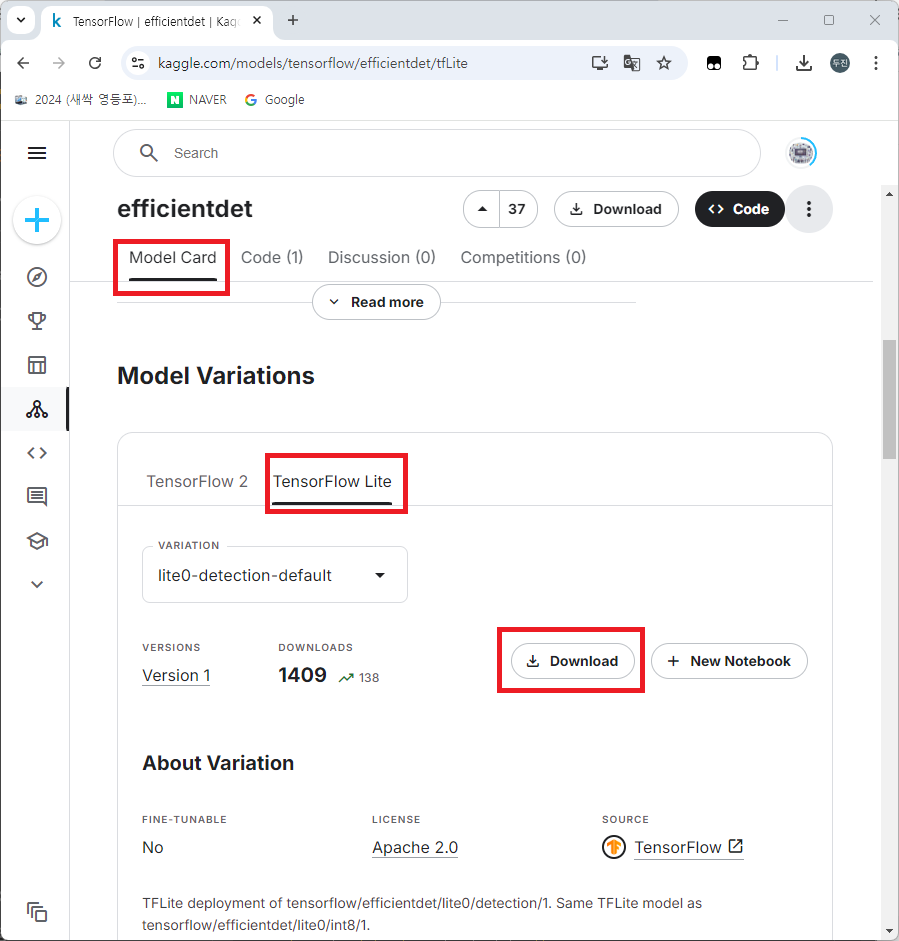
tensorflow의 efficientdet 모델의 "TensorFlow Lite" 버전을 아래의 kaggle 링크에서 다운로드 받습니다.
https://www.kaggle.com/models/tensorflow/efficientdet/tfLite
- colab 마운트
from google.colab import drive
drive.mount('/content/drive')

# 나의 루트 경로 설정
rootdir = '/content/drive/MyDrive/Colab Notebooks/'
모델 불러오기
import tensorflow as tf

m_path = 'pretrained_models/lite-model_efficientdet_lite0_detection_default_1.tflite'
interpreter = tf.lite.Interpreter(model_path = rootdir + m_path)
interpreter.get_input_details()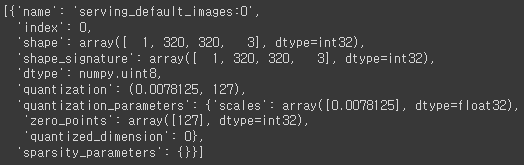
interpreter.get_output_details()
이미지 불러오기
img_path = 'pretrained_models/img_detect.jpg'

import glob
from PIL import Image
import numpy as np
import matplotlib.pyplot as plt

x_data = []
for imgname in glob.glob(rootdir + 'pretrained_models/*.jpg'):
  print(imgname)
  img = Image.open(imgname)
  img = img.resize((320, 320))
  ndimg = np.array(img)
  print(ndimg.shape)
  plt.imshow(ndimg)
  plt.show()
  x_data.append(ndimg)
x_data = np.array(x_data)
print(x_data.shape)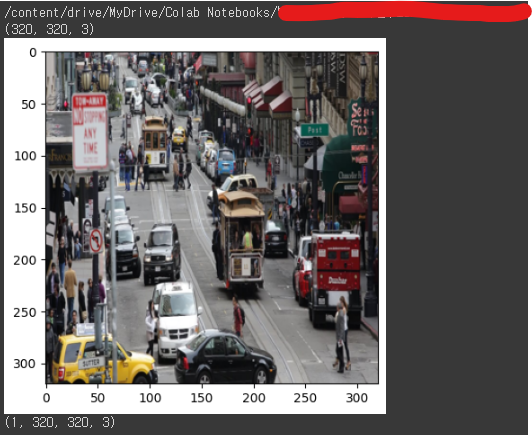
object detection 하기
interpreter.allocate_tensors()
interpreter.set_tensor(interpreter.get_input_details()[0]['index'], x_data)
interpreter.invoke()
output = []
for idx in range(0, 4):
output.append(interpreter.get_tensor(interpreter.get_output_details()[idx]['index']).squeeze())
결과 값 확인
- output[0] : object 위치 좌표
output[0]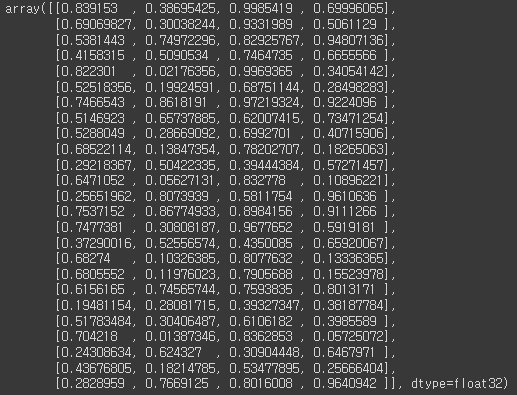
- output[1] : object의 클래스
output[1]
- output[2] : object의 정확도
output[2]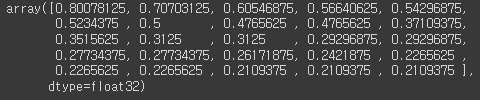
- output[3] : 인식된 object의 수
output[3]
Class 불러오기
아래의 "COCO2017_classes.txt" 파일을 다운 받습니다.
해당 경로로 이동 후 아래의 코드로 읽어 옵니다.
아래와 같이 object detection 시, 분류값으로 넘어오는 숫자와 매칭되는 클래스 값이 들어있습니다.
COCO 데이터 세트에 대해서 궁굼하시면 아래 링크에서 추가확인 하시기 바랍니다.
https://tech.amikelive.com/node-718/what-object-categories-labels-are-in-coco-dataset/
labels = []

f = open(rootdir + 'pretrained_models/COCO2017_classes.txt')

line = f.readline()
#print(line)
f.close()

labels = line.lower().split(',')
print(labels)
인식 객체 표시
import cv2
CAMERA_WIDTH = 320
CAMERA_HEIGHT = 320

def show_result(count, boxes, classes, scores, img, labels, threshold = 0.5):
  results = []
  for i in range(int(count)):
    if (scores[i] >= threshold):
      # print(scores[i])
      result = {
          'class' : labels[int(classes[i])],
          'score' : scores[i],
          'box' : boxes[i]
      }
      results.append(result)

  print(results)
  print(results[0]['box'][0] * CAMERA_WIDTH)
  print(results[0]['box'][1])
  print(results[0]['box'][2])
  print(results[0]['box'][3])

  for result in results:
    img = cv2.resize(img, (CAMERA_WIDTH, CAMERA_HEIGHT))

    ymin, xmin, ymax, xmax = result['box']
    (left, right, top, bottom) = (int(max(1, xmin * CAMERA_WIDTH)), int(min(CAMERA_WIDTH, xmax * CAMERA_WIDTH)),
                                  int(max(1, ymin * CAMERA_HEIGHT)), int(min(CAMERA_WIDTH, ymax * CAMERA_HEIGHT)))
    pt1 = (left, top)
    pt2 = (right, bottom)

    # 박스 그리기
    cv2.rectangle(img, pt1, pt2, (0, 255, 0), 2)
    # 객체 이름 쓰기
    cv2.putText(img, result['class'] + '/' + str(round(result['score'], 2)), pt1, cv2.FONT_HERSHEY_SIMPLEX, 0.5, (0, 0, 255), 1, cv2.LINE_AA)

  img = cv2.cvtColor(img, cv2.COLOR_BGR2RGB)
  plt.imshow(img)
  plt.show()
show_result(output[3], output[0], output[1], output[2], x_data[0], labels, 0.4)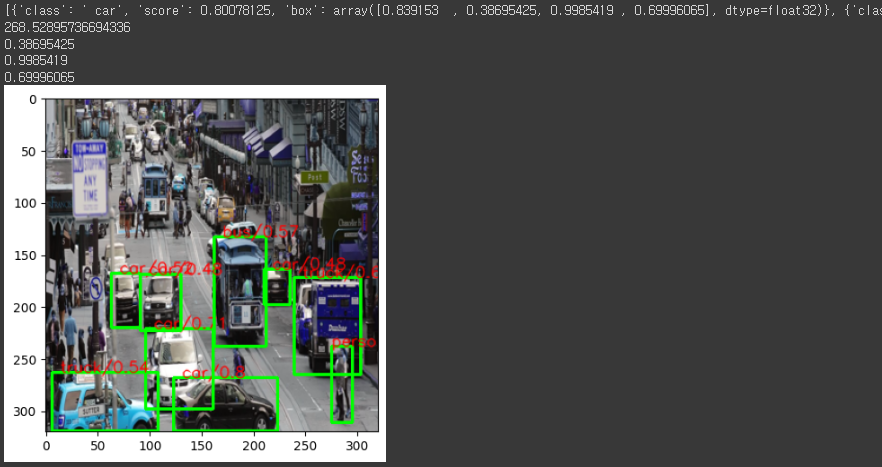
끝~

'AI Tutorial' 카테고리의 다른 글
| [Python] 대용량 csv 엑셀파일 읽기 (0) | 2024.10.16 |
|---|---|
| [Python] 동일 폴더의 Excel 파일 모두 합치기 (1) | 2024.10.16 |
| [텍스트마이닝] 감성분석-네이버 영화리뷰 (3) | 2024.09.04 |
| [텍스트마이닝] 이란? (0) | 2024.09.03 |
| [Python] 전이학습(Transfer Learning) 설명 (0) | 2024.08.29 |
'AI Tutorial' Related Articles
more


